


NGINX is open-source software for web serving, reverse proxying, caching, load balancing, media streaming, and more. It started out as a web server designed for maximum performance and stability. In addition to its HTTP server capabilities, NGINX can also function as a proxy server for email (IMAP, POP3, and SMTP) and a reverse proxy and load balancer for HTTP, TCP, and UDP servers.
NGINX Features
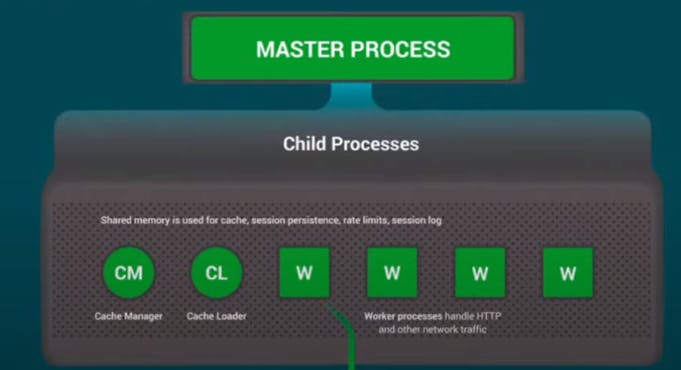
Serve child services for each service.
Reverse Proxy: In your local environment, have a running web application with (localhost:8000); this is your local IP and port. For production use (user access), this IP and port will not work. In this case, NGINX provides a reverse proxy service that makes tunnels and provides services to the user.
Load Balancing: If the load increases, load balancing is a service that can redirect the load.
URL Redirection, Indexing, and Caching: Sometimes we have seen that 404 errors happen. In this case, the URL Redirection service of NGINX redirects your application to another URL.
Step 1: Create a Web Server in AWS EC2.
Note: It means to create an instance.
Step 2: Install NGINX Server on your server.
- Update and install the NGINX server by following the command
sudo apt-get update
sudo apt-get install nginx
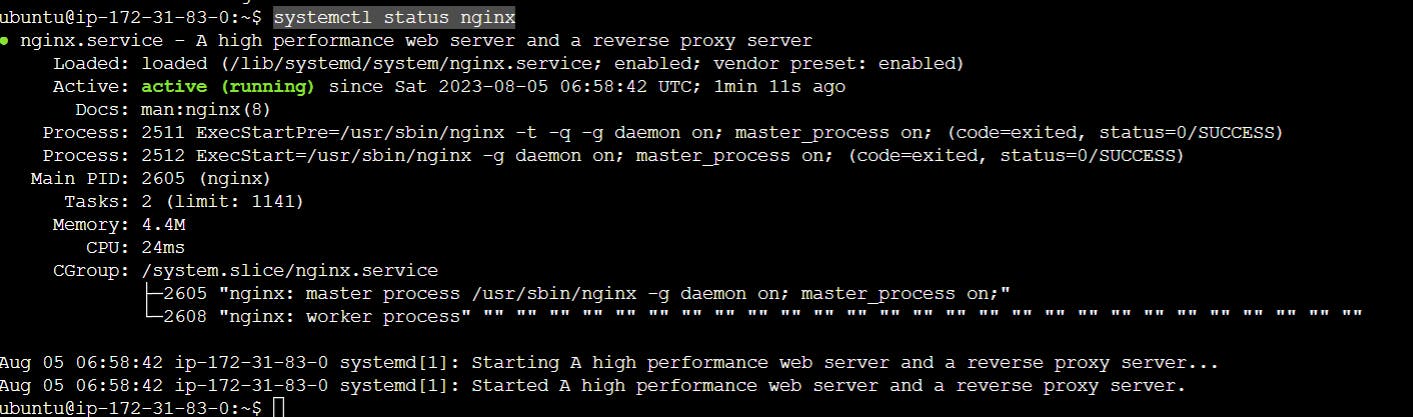
sudo systemctl status nginx
Example Output:
- Restart your Nginx server by following the command:
sudo systemctl restart nginx
Now take your public IP and open a new tab, paste your public IP, and run it. You will see your Nginx server is running.
Note: NGINX servers run by default on port 80.
Example Output:
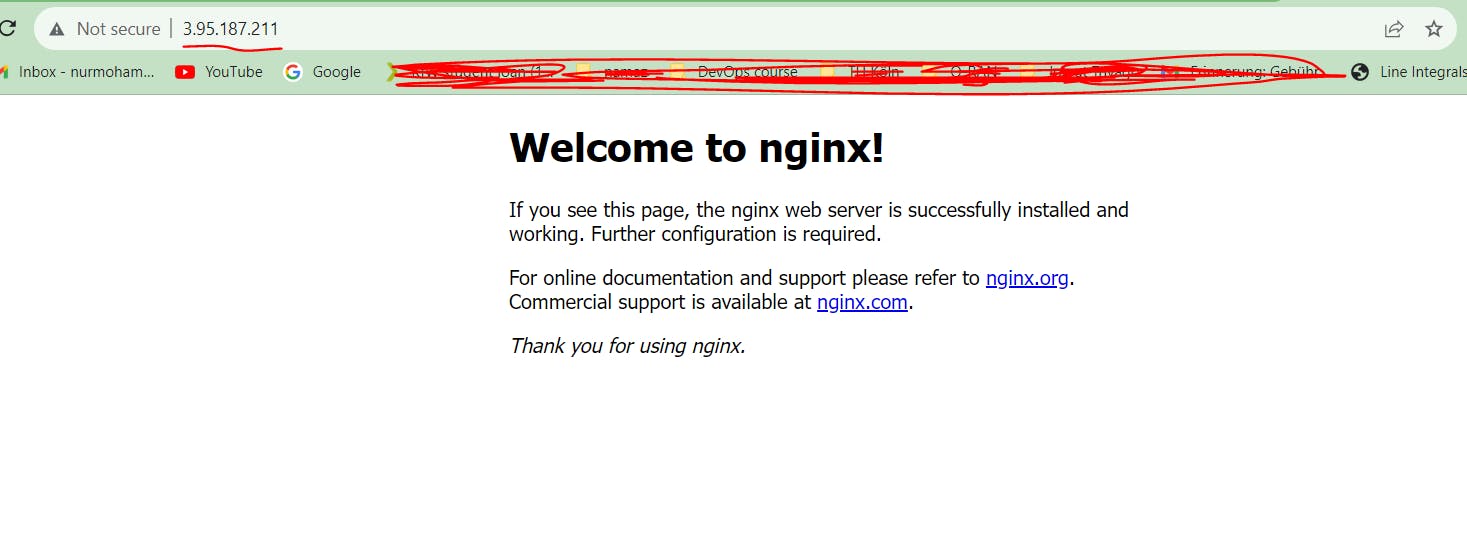
Note: Now the NGINX server is running and we can see the output. When we install NGINX, it will pull all the necessary codes and store them in your local area. To check this, run the following command:
cd /var/www/html
ls
#Here is a html file (index.nginx-debian.html)
All NGINX configuration files are located on your local server. To see this, run the following command:
cd /etc/nginx
Example output:

Note: Here we can see a lot of files and directories. "nginx.conf" is an NGINX configuration file. If you want to deploy a website or web application for this service, NGINX has two folders: "sites-enabled" and "sites-available".
Now read the nginx.conf file. Try to understand what is inside this file.
#nginx.conf
user www-data;
worker_processes auto;
pid /run/nginx.pid;
include /etc/nginx/modules-enabled/*.conf;

events {
        worker_connections 768;
        # multi_accept on;
}

http {

        ##
        # Basic Settings
        ##

        sendfile on;
        tcp_nopush on;
        types_hash_max_size 2048;
        # server_tokens off;

        # server_names_hash_bucket_size 64;
        # server_name_in_redirect off;

        include /etc/nginx/mime.types;
        default_type application/octet-stream;

        ##
        # SSL Settings
        ##

        ssl_protocols TLSv1 TLSv1.1 TLSv1.2 TLSv1.3; # Dropping SSLv3, ref: POODLE
        ssl_prefer_server_ciphers on;

        ##
        # Logging Settings
        ##

        access_log /var/log/nginx/access.log;
        error_log /var/log/nginx/error.log;

        ##
        # Gzip Settings
        ##

        gzip on;

        # gzip_vary on;
        # gzip_proxied any;
        # gzip_comp_level 6;
        # gzip_buffers 16 8k;
        # gzip_http_version 1.1;
        # gzip_types text/plain text/css application/json application/javascript text/xml application/xml application/xml+rss text/javascript;

        ##
        # Virtual Host Configs
        ##

        include /etc/nginx/conf.d/*.conf;
        include /etc/nginx/sites-enabled/*;
}


#mail {
#       # See sample authentication script at:
#       # http://wiki.nginx.org/ImapAuthenticateWithApachePhpScript
#
#       # auth_http localhost/auth.php;
#       # pop3_capabilities "TOP" "USER";
#       # imap_capabilities "IMAP4rev1" "UIDPLUS";
#
#       server {
#               listen     localhost:110;
#               protocol   pop3;
#               proxy      on;
#       }
#
#       server {
#               listen     localhost:143;
#               protocol   imap;
#               proxy      on;
#       }
#}
"sites-enabled" is responsible for running any configuration file. So, go to this directory and have a look. There is also a directory named "default".
We will do all of our activities in this folder or directory.
cd sites-enable
ls
Example output:

- Now go to the default folder and edit if you need anything.
vim default
Example output:
##
# You should look at the following URL's in order to grasp a solid understanding
# of Nginx configuration files in order to fully unleash the power of Nginx.
# https://www.nginx.com/resources/wiki/start/
# https://www.nginx.com/resources/wiki/start/topics/tutorials/config_pitfalls/
# https://wiki.debian.org/Nginx/DirectoryStructure
#
# In most cases, administrators will remove this file from sites-enabled/ and
# leave it as reference inside of sites-available where it will continue to be
# updated by the nginx packaging team.
#
# This file will automatically load configuration files provided by other
# applications, such as Drupal or Wordpress. These applications will be made
# available underneath a path with that package name, such as /drupal8.
#
# Please see /usr/share/doc/nginx-doc/examples/ for more detailed examples.
##

# Default server configuration
#
server {
        listen 80 default_server;
        listen [::]:80 default_server;

        # SSL configuration
        #
        # listen 443 ssl default_server;
        # listen [::]:443 ssl default_server;
        #
        # Note: You should disable gzip for SSL traffic.
        # See: https://bugs.debian.org/773332
        #
        # Read up on ssl_ciphers to ensure a secure configuration.
        # See: https://bugs.debian.org/765782
        #
        # Self signed certs generated by the ssl-cert package
        # Don't use them in a production server!
        #
        # include snippets/snakeoil.conf;

        root /var/www/html;

        # Add index.php to the list if you are using PHP
        index index.html index.htm index.nginx-debian.html;
        server_name _;

        location / {
                # First attempt to serve request as file, then
                # as directory, then fall back to displaying a 404.
                try_files $uri $uri/ =404;
        }

        # pass PHP scripts to FastCGI server
        #
        #location ~ \.php$ {
        #       include snippets/fastcgi-php.conf;
        #
        #       # With php-fpm (or other unix sockets):
        #       fastcgi_pass unix:/run/php/php7.4-fpm.sock;
        #       # With php-cgi (or other tcp sockets):
        #       # With php-cgi (or other tcp sockets):
        #       fastcgi_pass 127.0.0.1:9000;
        #}

        # deny access to .htaccess files, if Apache's document root
        # concurs with nginx's one
        #
        #location ~ /\.ht {
        #       deny all;
        #}
}


# Virtual Host configuration for example.com
#
# You can move that to a different file under sites-available/ and symlink that
# to sites-enabled/ to enable it.
#
#server {
#       listen 80;
#       listen [::]:80;
#
#       server_name example.com;
#
#       root /var/www/example.com;
#       index index.html;
#
#       location / {
#               try_files $uri $uri/ =404;
#       }
#}
Note: If we make an index.html file in the "/var/www/html" folder, it should be run. Next, try this. First, go to this directory and create an index.html file.
Example file:
<html>
<body bgcolor="green">

    <h1> <center> <font size =40 color="red"> Hello World </font></center> </h1>                     <br>
    <h2>  <center><font size =30 color="white"> Mys name is Md Nur Mohammad </font></center> </h2>          <br>
    <h3> <center> <b><i><u> I am from Bangladesh </u></i></b> </center> </h3> <br>
    <p> Paragraph tag </p>                                <br>

    <hr>
    <center> Contact me </center>
    <hr>
</body>
</html>
Note: Output will be generated by this application.
Now we will do a project on GitHub.
Take your code from GitHub. In my case, I do copy Django app codes.
Note. My code link: https://github.com/mmohamm5/django-todo-app
Just clone this code.
Step 1: Follow the README.file and run all of the commands.
sudo apt install docker.io
sudo usermod -a -G docker $USER
docker build -t notes-app .
docker run -d -p 8000:8000 notes-app:latest
Note: We have created Docker images and a Docker container.
Step 2: Now we will run this application through the reverse proxy service from NGINX.
- Run this application on your local host by following the command:
curl -L http://127.0.0.1:8000
Example output:
ubuntu@ip-172-31-83-0:~/django-todo-app$ curl -L http://127.0.0.1:8000
<!doctype html><html lang="en"><head><meta charset="utf-8"/><link rel="icon"
href="/favicon.ico"/><meta name="viewport" content="width=device-width,initial
-scale=1"/><meta name="theme-color" content="#000000"/><meta name="description"
 content="Web site created using create-react-app"/><link rel="apple-touch-icon
" href="/logo192.png"/><link rel="manifest" href="/manifest.json"/><title>TWS
Community is Amazing</title><script defer="defer" src="/static/js/main.08442c14
.js"></script><link href="/static/css/main.e7772a38.css" rel="stylesheet"></
head><body><noscript>You need to enable JavaScript to run this app.</noscript>
<div id="root"></div></body></html>
Note: It means my application is running on my local host, and there is no access from outside of my server. Now we will make it outside of the server. In this case, a NGINX reverse proxy server is needed.
Step 3: Use NGINX reverse Proxy Services.
- Go to "/etc/nginx/sites-enabled". Here is the default configuration. We need to change this default configuration to run our application worldwide.
cd /etc/nginx/sites-enabled
ls
default
- Change the default file by running the following command:
sudo vim default
- Inside the default file change in "location" option and add "proxy_pass http://127.0.0.1:8000;"
server_name _;
locaton / {
        proxy_pass http://127.0.0.1:8000;
        # First attempt.......
        #As directory,............
        try_files $uri $uri/ =404;
Note: We did that because we will run our application on localhost. It will pass through a proxy server. It should run our application.
- Once we edit the default file, we need to restart the NGINX server. Run the following command to do this:
sudo systemclt restart nginx
Now refresh our page, and we will see our application is running, but it will show a blank white page. Because we did not provide our HTML file to the root folder. We can change the root path in the default file, or we can put all our code in the root path.
Now we will put all of our HTML or other code in the root path.
First, go to your folder, which is cloned from git. Enter static files, copy all the files, and send the "/var/www/html" nginx path.

Now we will copy all files from the staticfiles folder to our nginx html folder.
sudo cp -r * /var/www/html/
Note: sudo means from root user. cp means copy, -r means recursively and * means all files and paste it to this destination, "/var/www/html/"
Example :
ubuntu@:~/django-todo-app/mynotes/build$ ls
asset-manifest.json  favicon.ico  index.html  logo192.png  logo512.png  manifest.json  robots.txt  static
ubuntu@:~/django-todo-app/mynotes/build$ sudo cp -r * /var/www/html/
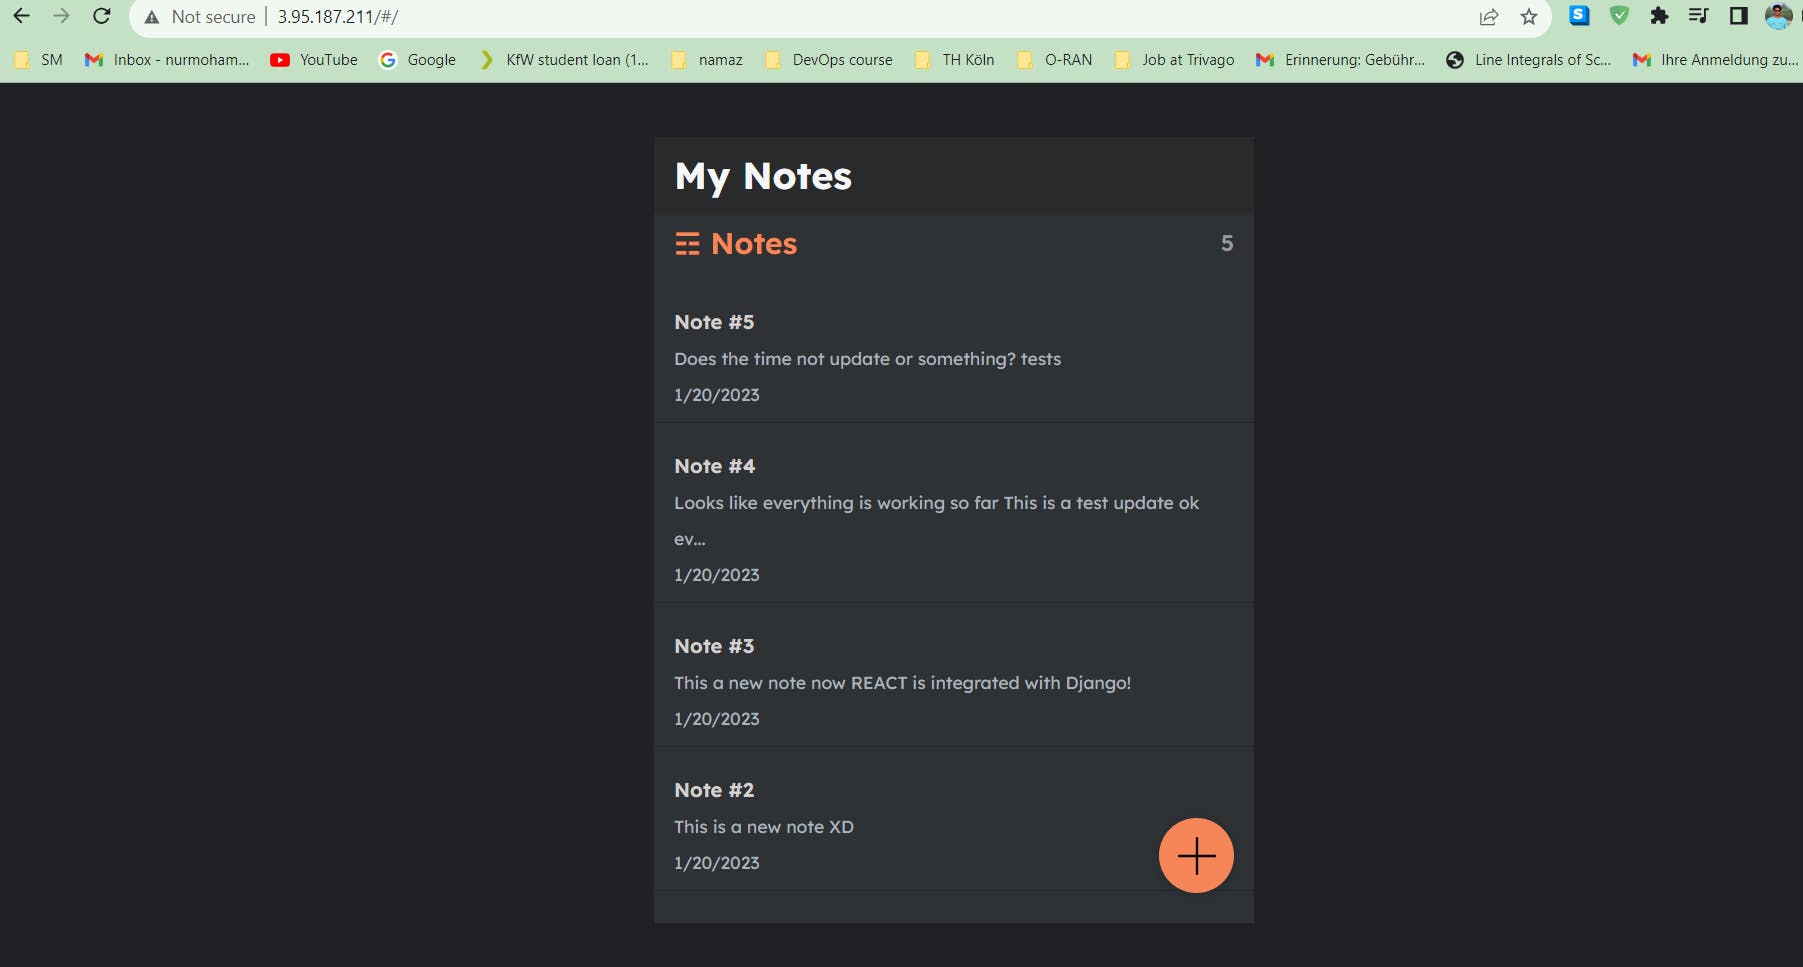
Note: Now refresh your page, and you will see your app is running.
Example:
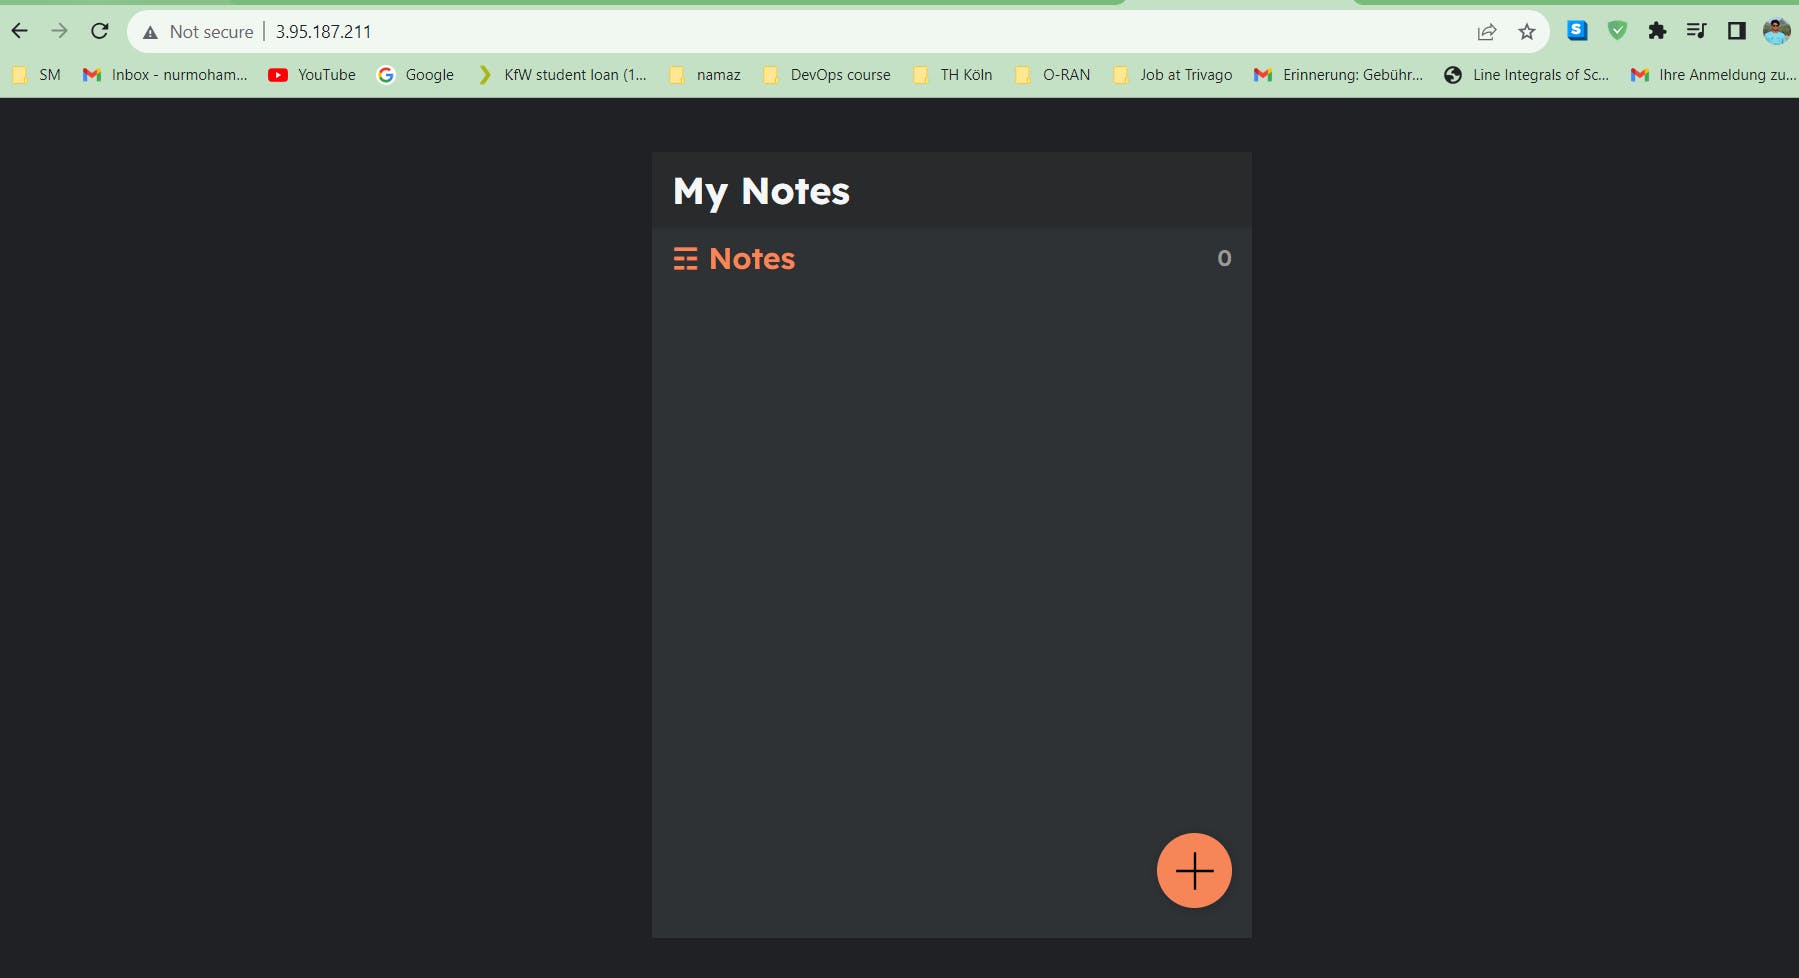
Note: If we write something in these notes, it will not save because we did the frontend part and now we will do the backend part.
- Check if your backend is running or not with the following command:
curl -L http://127.0.0.1:8000/api
Example output:
ubuntu@ip-172-31-83-0:~$ curl -L http://127.0.0.1:8000/api
[{"Endpoint":"/notes/","method":"GET","body":null,"description":"Returns an
array of notes"},{"Endpoint":"/notes/id","method":"GET","body":null,"description
":"Returns a single note object"},{"Endpoint":"/notes/create/","method":"POST",
"body":{"body":""},"description":"Creates new note with data sent in post
request"},{"Endpoint":"/notes/id/update/","method":"PUT","body":{"body":""},
"description":"Creates an existing note with data sent in post request"},
{"Endpoint":"/notes/id/delete/","method":"DELETE","body":n
Note: It means the backend API is running, but it is running on localhost. Now we need to pass this in the nginx proxy pass.
- Go to nginx's "etc/nginx/sites-enabled" to "default" and edit this default file.
 root /var/www/html;

        # Add index.php to the list if you are using PHP
        index index.html index.htm index.nginx-debian.html;

        server_name _;

        location / {
                proxy_pass http://127.0.0.1:8000;
                # First attempt to serve request as file, then
                # as directory, then fall back to displaying a 404.
                try_files $uri $uri/ =404;
        }
        location /api{
                proxy_pass http://127.0.0.1:8000/api;
        }
Note: The last part of the location is added here. Now save it, restart the Nginx server, and refresh your application.
#restart your nginx server
sudo systemctl restart nginx
Example output:
Note: Now our backend and frontend are connected.
Run this application through DNS
- Go to godaddy.com to buy a domain
Note: It will charge money.